Introduction
It would be difficult for most people to imagine the amount of testing that goes into a product review. I think most reading this have run a benchmark on their system before, but few can really grasp what it means to systematically run test after test without varying order or timeline. We run a lot of tests, several more than what makes it into a final review. Once you master the art of testing and the discipline of keeping a dedicated test machine, certain patterns emerge. Some of these show up in the tests that are published and sometimes they show up in others. When a test shows something of value and isn't redundant with another test, we typically bring that test into the review. This can sometimes be to explain something we saw in another test or at times add a way to look at a product.
In June 2010 at Computex we were given the opportunity to test an early sample of the ADATA S501. The S501 uses the Marvell 88SS9174-BKK2 controller, the same used in the Corsair Performance 3 and Intel 510 Series. In our post review testing we noticed that even after pounding the drive with our entire test suite the drive actually increased both read and write performance by a small margin. Typically, as a new drive gets 'broken in', performance decreases; this is called bringing the drive to a steady state.
We've always liked the idea of steady state testing, but found it is difficult to determine just how much pretesting needs to be conducted before a drive is at that point. It has been far easier to start with a fresh drive to record data and progressively work through the tests, always in the same order to keep uniformity in the testing procedure and performance analysis. To put it simply, if we beat the hell out of each drive at the same rate we retain apples to apples comparisons across all products.
When the ADATA S501 performed the impossible, we were caught off guard and left to think about what happened for nine months. After purchasing three Corsair Performance 3 drives we had everything needed to unravel the mystery and even found another oddity.
Drive Performance with Data Onboard
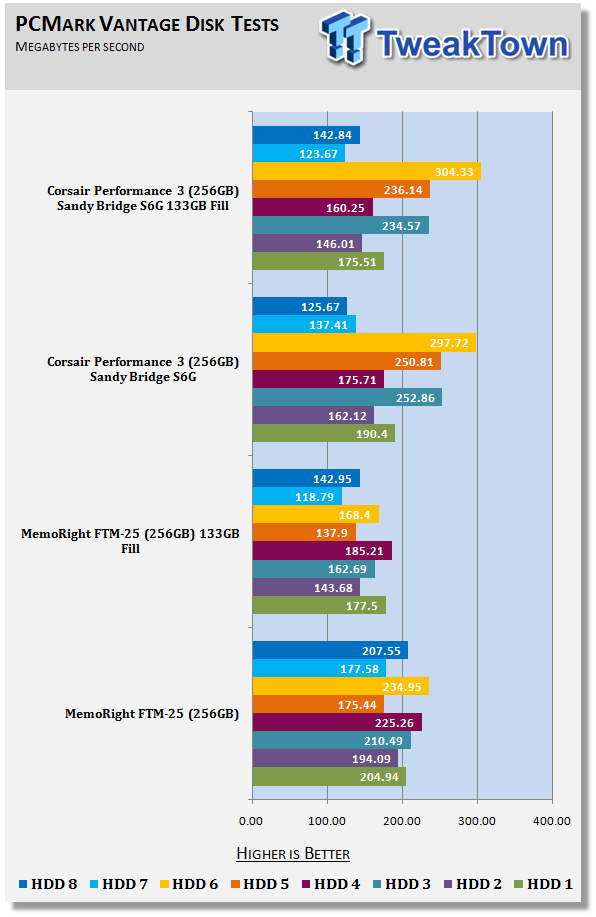
You may remember this chart from the Corsair Performance 3 256GB SSD review a few weeks back. In this test we grabbed some random files off the QNAP TS-809 Turbo NAS that my family has taken over. This test was fairly straight forward - fill around 50% of a drives capacity and then run a simple, but thorough benchmark. The results speak for themselves - the SandForce SF-1200 based MemoRight FTM-25 256GB drive slows when data is present on the drive, but the Corsair Performance 3 256GB drive keeps roughly the same performance level with and without data on the drive. The fill test was born.
It is important to point out that the SandForce SF-1200 isn't the oddity in this small test group. We've known for a long time that all SSDs slow as they fill with data. The odd ball out of the group was the Corsair Performance 3 with the Marvell 88SS9174-BKK2 controller.
On the first page we talked about the amount of testing that goes into a review and that some tests are published and some are not. The next thing I would like to point out is that all of our tests are publically available and easily obtained. You can read about the previous testing methods in this article. That document is going to need a revision soon.
Being transparent with our testing methods and using software easily accessible not only keeps us honest, but also allows you to test your products at home to see if they are working as they should. I hate to say it, but there are review sites out there that have been proven to 'fudge the numbers' in order to attract readers. Doing things like changing a benchmark perimeter in order to achieve a higher performance result is not that uncommon. It is dishonest, though.
So, we have a new benchmark. Let's show you what it does and how to set it up.
The Methodology
The objective to this test is to see how a drive performs when data is present on the drive. To achieve this goal we needed a methodology for testing, a large number of files that are easily available, and to be able to keep it simple. As a reviewer who runs a ton of benchmarks, I also wanted the perpetration to be fast. As a professional I wanted the results to be accurate and fair to all of the drives we test.
SandForce: A New Hope or The Phantom Menace?
I've wanted to use that title for so long - I can't even remember when it first came into my mind. SandForce has a very unique system that is able to take data that is uncompressed and compress it as it's written. In a sense they are cheating, but you know the saying - All is fair in love....
The SandForce SF-1000 Series and the soon to be released SF-2000 Series is not only unique, they kick some serious butt. SandForce has the dominating SSD technology, but we needed to keep in mind that filling a drive with just compressed data wouldn't be fair to SandForce, their competitors or you, the readers.
What we wanted to achieve is a balance of compressed and uncompressed data on the drive, exactly like what you have on your boot drive right now. If you open your C drive right now and start poking around, you will find programs, pictures, music, documents and a whole list of things, some of which we wouldn't even want to know about. So for this test we are going to simulate data that is already on your drive. The trick is to choose data that could be on your drive, a mix of different file types, but this data has to be easily available to everyone.
Since SSDs are sold in specific sizes; 64GB, 128GB, 256GB and so on, we had the first part of the equation. The next set of numbers came from the points we wanted to test; 25%, 50% and 75% capacity (full). This is what I came up with.
64GB Drive - 15GB, 30GB, 45GB
128GB Drive - 30GB, 60GB, 90GB
256GB Drive - 60GB, 120GB, 160GB
The smallest dominator of the fill test is 15GB. So that is where we started. We made a 15GB block of data and then replicated it on the drive to make 30GB, then doubled it to make 60GB. This gives us a base 15GB of data that can easily scale to the fill volume we need.
Let's go get the files needed to test.
Test Preparation
To get started you will need to download a few files. Below is the list and a brief explanation about the file. Don't worry; we are not going to make you download 15GB of data. Just follow the steps explained.
The Image File: http://forums.dpreview.com/forums/read.asp?forum=1037&message=26643638
I ran across this picture while looking for an image publically available from the same camera I use. Click the link, let the 8MB image load, then right click, save as what it is titled into a folder called Image Files.
The PDF Document: http://www.competitionsystems.co.uk/product.php?id=104
In the middle of that page you will find a PDF file, Download Digitek Falcon Race Dashboard Data Sheet. Right click on the link, save as what it is titled into a folder called PDF. If anyone wants to send me the dash, please feel free to - I really want one!
The Program File: http://rfactor.net/downloads/
rFactor is a game I enjoy playing and was an easy choice for this list. Download it into a folder named ISO Files. You need Full V1255 Installer.
WAV Audio File: http://www-mmsp.ece.mcgill.ca/documents/audioformats/wave/Samples.html
Scroll down to find 8_channel_ID_wav (8,8MB). Right click the file, save as what it is titled into a folder called WAV.
Compressed Audio: http://ravearchive.com/mixtapes/Frankie_Bones/Live_At_Get_Freaky
This file was chosen because I was live at Get Freaky and because it's one of my favorite live sets of all time. Half way down on the left side you will see what looks to be a speaker. Next to it is a green arrow pointing to a gray box. Right click on the gray box, save as what the file is called into a folder named MP3.
ISO File: Window 7 DVD
This one is fairly easy and you should have it at home. Make an ISO file of your Windows 7 DVD. Keep the DVD in your drive, you will need it again.
Video File: The Magic of Flight 1080
This video file used to be available on Microsoft's website, but has since been removed. You can now download it at the link provided above. Download the file and unzip into a folder named Video Files.
Folder Preparation
Now that you have a bunch of files and folders on your desktop, it is time to get them arranged in the 15GB block.
1. Make a folder named 15GB Block.
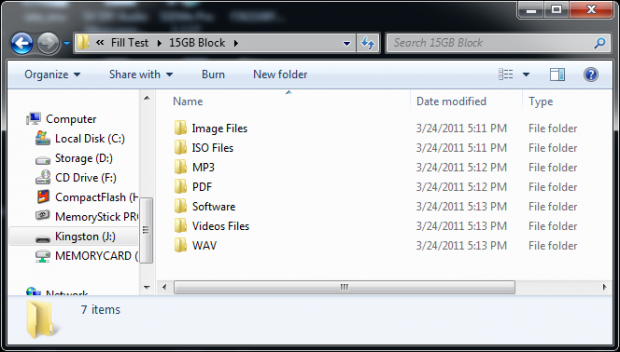
2. Inside 15GB Block make the following folders - Image Files, ISO Files, MP3, PDF, Software, Video Files, and finally, WAV. Your folder should look like mine in the image above.
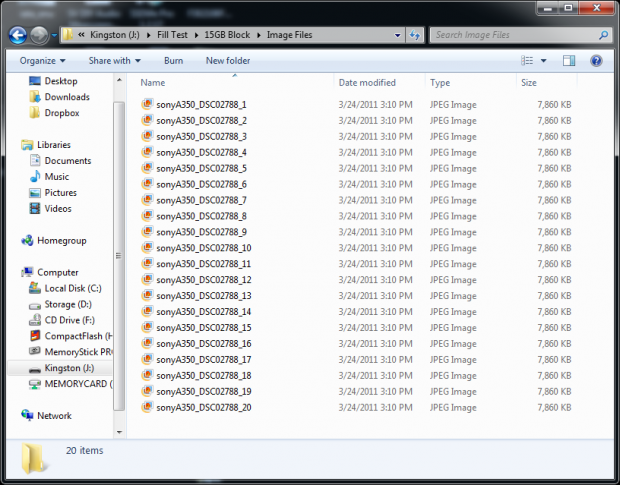
3. In the Image Files folder replicate your downloaded image 20 times. This is just a simple copy and paste after changing the image name each time.

4. In the ISO Files folder place your Windows 7 DVD and rFactorSetup1255 inside. Yours should look like mine. There are different variations to the Windows 7 DVD, but for the most part they are all very close in size.
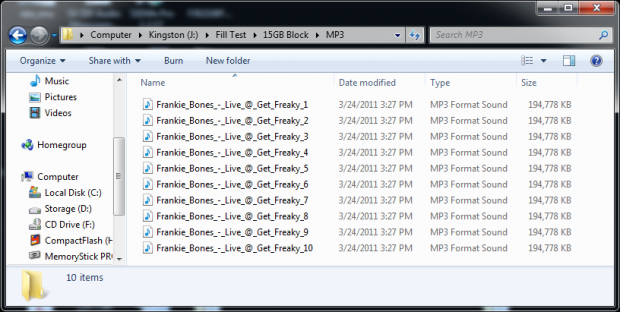
5. The next step is to replicate the Frankie_Bones_-_Live_at_Get_Freaky file 10 times in the MP3 folder. If you are getting tired from all of this renaming, now is the time to start listening.
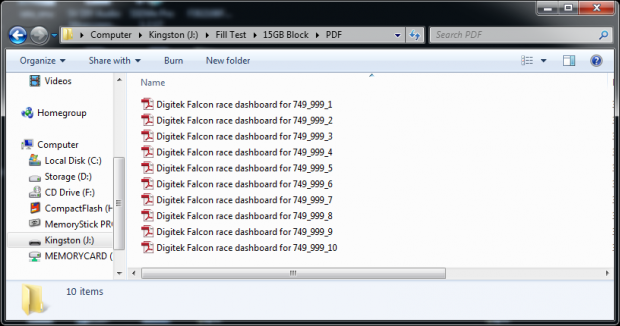
6. In the PDF folder replicate the Digitek Falcon race dashboard for 749/999 file 10 times.

7. This step is a multipart process. I'm sorry it couldn't be easier, but we needed to get some program files. The first step is to copy all of the files from the Windows 7 DVD into a folder, called Windows 7 Decompressed. When that is finished, place the folder into a folder called Software.
8. The next step is to install rFactor on your computer. Once complete, go to your Program Files and copy the folder called rFactor to the Software folder three times. When you are finished you will have a Software folder that looks like mine above.
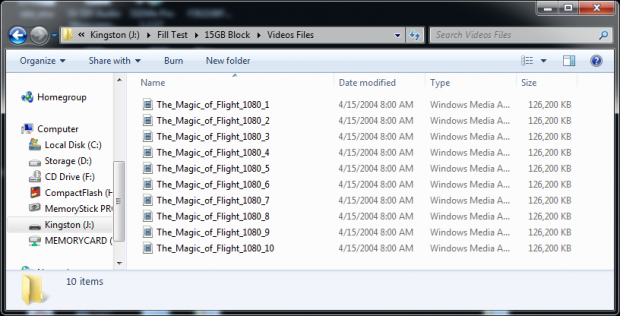
9. We are getting really close now. If you are listening to Frankie you are almost to the good part. Replicate the file titled The_Magic_of_Flight_1080 into a folder named Video Files.
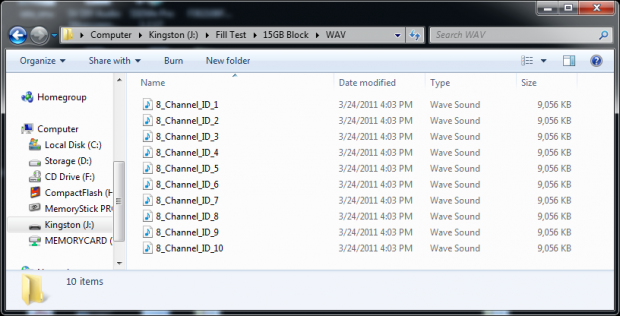
10. The last one! Replicate the file named 8_channel_ID into a folder named WAV 10 times.
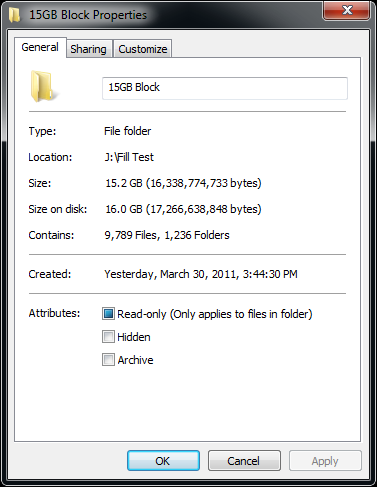
When you are finished you should have roughly the same size 15GB Block folder as I have. The folder size can vary based on the file system the drive is using. On my NTFS boot drive the folder is 15.1GB, but on my external drive it shows as 15.2GB.
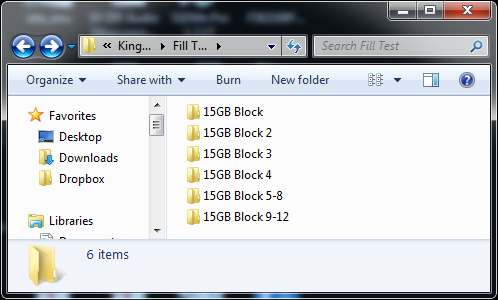
Now that you have a folder named 15GB Block, save it where you will not lose it. Also, make additional folders that are empty called 15GB Block 2, 15GB Block 3, 15GB Block 4, 15G Block 5-8 and finally 15GB Block 9-12. These will late be used to populate your drive with data by replicating the data in the original 15GB Block folder.
Performance Testing

Today we will go through a mock test of a 256GB (240GB SandForce) capacity drive.
64GB Drive - 15GB, 30GB, 45GB
128GB Drive - 30GB, 60GB, 90GB
256GB Drive - 60GB, 120GB, 160GB
Using our cheat sheet, we see that we need to start with 60GB of data to fill the drive to roughly 25%. Copy your first four folders on the drive you wish to test. Once the files are on the drive open the folder named 15GB Block, and then highlight the files inside - click copy. Paste the files in the three remaining folders. Once complete you should have roughly 60GB of data on your 256GB drive.
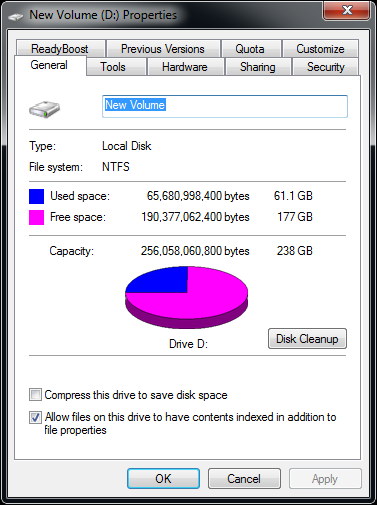
If you right click on your drive and view properties, you should see just over 60GB of used space.
Vantage Testing
At this point close everything, restart your computer and run PCMark Vantage's HDD tests. You can find a guide to testing with Vantage on this page.
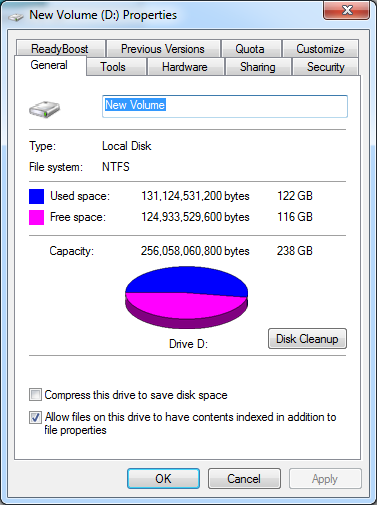
Once you have recorded your scores and saved your Excel document, it is time to fill the drive further. The folder you made named 15GB Block 5-8 needs to be copied to your drive. Then, take the first four Block folders and copy them into the new Block 5-8 folder. Once completed you should have around half of your 256GB drive filled with data. Run PCMark Vantage again and record the results.
The final step is to take your Block 9-12 folder and paste it on the drive. Once again, copy Blocks 1-4 into the new Block 9-12 folder. You should now have roughly 75% of your SSD filled with data.
Once you have completed the 75% there is one last test to tackle. For now I'm calling it Empty / Dirty. The empty portion comes from deleting all of the Blocks of data you've filled your drive with. The dirty part comes from the drive being in a very used state.
Delete the data, clear your recycle bin and then run PCMark Vantage one last time on the drive. Record your results.
I just wanted to chime in with a quick note. I do not recommend running these tests on your SSDs. NAND flash can only be written to so many times before it cannot write anymore. The term wear and tear is appropriate when putting an SSD through this type of test.
Benchmarks Results and Final Thoughts
Benchmark Results

To date we've ran a handful of drives through the Fill Test, most of them over and over to confirm the results. We do have a large archive of SSDs and will gradually go back and test some of the significant products. You should see drives like the original Vertex, Vertex 2, Crucial RealSSD C300, Corsair Nova and possibly a few more added to charts in the not too distant future. These entries are mainly for archive purposes so we can have a long list of models to look for patterns with.
Final Thoughts
It's not every day we write a seven page document over a single test, but this isn't exactly a regular test either.
Solid state drives are the future and as time passes the technology will advance to push boundaries beyond what we can foresee at this time. Last year we didn't expect to see a single drive deliver over 500MB/s, but just around the corner we will have it. What is truly amazing is that 500MB/s performance will start out with a price tag of just 250 USD (MSRP, 120GB OCZ Technology Vertex 3, SandForce SF-2200 Based).
The test we built today goes to show that even though SSDs are quickly reaching the limits of SATA 6G, there are still areas in which performance can be improved upon. We are just starting a new cycle for SSDs and things like firmware development and NAND flash choices will affect our Fill Test results. Over time manufacturers can look to design better SSDs that don't lose performance, such as the Corsair Performance 3.
